When I picture the windows open in a room, I imagine warm sunshine streaming through as the wind gently blows the curtains. Fresh air hits me and I am compelled to take a deep breath. The refreshing energy fills my soul. Of course there are only certain seasons when it's practical to open the windows, but my goal is to fill my heart, home, and family with a beautiful serenity that always makes me think the windows are open!

Wednesday, April 13

Outdoor Fun this Spring

The weather here has been SO nice this spring that I’ve been spending most of my time outdoors.  And my indoor projects (and blog) have taken a backseat.

Here are some of the fun projects I’ve been doing outside.

The Garden
We put in a large garden this year (1200 sqft) with carrots, asparagus, corn, beets, okra, cauliflower, squash, beans, cucumber, tomatillos, peppers, tomatoes, and lettuce.  Oh and did I mention weeds?  Yes, they seem to grow faster and better than anything else. Go figure!

garden

I built some pepper “cages” out of bamboo sticks.  We have bamboo growing on the edge of the orchard so they were free.

bamboo for peppers


I’m waiting impatiently for these tomatoes to turn red and show up on my supper table.

green tomatoes
Roses
I also spent the better part of a Saturday putting up some trellis and getting my rose bush to climb it.  This display was sure worth it!


rose trellis


Yard fence and gate

Hubby, my dad, and I also spent some time putting in a back gate out to our pond.

back gate


Then I started work on our yard fence. 

yard fence1

yard fence 3


Each post has an 80 lb bag of concrete and about 15 lbs of rock in it.  Good thing I’ve built my strength carrying kids around all day!

yard fence 2


As you can see, I still have a ways to go.  Thank goodness hubby will be home all weekend!  Btw, he’s the one that rented an auger and dug all the holes.


more to do

Hope you’re finding some outdoor fun this spring too.  Get some vitamin D, but be sure to protect your skin from the UV.

Rebecca

Friday, March 11

Bringing Spring Inside

Leen over at Leen the Graphics Queen did a fabulous post about forcing Forsythia.  I’ve always wanted to try this and loved her easy explanation.


But when I went out into MY orchard, we live so far south that this is what I found on my trees.


blossoms


pear


plum and pear


plum outside1

The pear and the plum trees have already started blooming!!  Well maybe next year I’ll get to try forcing, but for now, I have beautiful flowers to put around the house.  And just in time for my parents to come visit.  We’re celebrating the baby’s 1st birthday and my dad’s 77th birthday this weekend.


Enjoy!


plum cut1


vase blossoms1


vase blossoms2


vase blossoms3


pitcher blossoms2


pitcher blossoms1


pitcher blossoms3


Rebecca

Linking up at:

Monday, March 7

Jumping on Board (and Batten)

It’s my turn to try out the delicious look of the board and batten in my home.  I’ve been stalking any blog post I could find that mentioned it and really loved how easy Karla @ It’s the Little Things and Décor Chick made it sound.  Then I procrastinated for about a century because I was sure the texture on my walls would be too obvious and look awful!

So to help convince myself, I Photoshopped some pics of my walls.


Before - right wall


Photoshopped - right wall


                                    Before - left wall


                        Photoshopped- left wall


(Did I not warn you before that this room is usually covered with toys?) <-- Follow this link for more before pics too.

Still unsure, I cut strips of paper and hung them on the wall.  I’m a very visual person and this really helped me to decide placement and size.  I moved the strips around until I was happy and felt a little more confident.  In the end I decided on 2-1/2 inch wide battens and placed them 16 inches apart - each one on a stud.  By doing this I knew they were evenly spaced and securely attached.  For the header, I picked a 3-1/2 inch wide board.

paper strips

I wanted something more substantial than the lattice board that Décor Chick used.  Instead I chose 3/4 inch thick primed mdf board in the widths I wanted.  Per sqft the price was actually less than the lattice and it was pre-primed!

So, finally I took the plunge and put three coats of semi-gloss white paint on the walls.  There was no turning back.

painted walls

I had pre-painted the battens a few weeks ago.  Then after lying in bed with the flu (and a million episodes of Rehab Addict later) I finally got them nailed up this weekend.  We love them!!!

B&B wall left

B&B wall right

I’m still considering to add a small plate ledge on top to place things on as Karla and Décor Chick did, but I couldn’t wait to show you this completed step in our family room redo!  More ideas in store…

Rebecca

Linking up at...


Making Making The Girl Creative
The DIY Showoff Tip Junkie handmade projects
Domestically Speaking


Saturday, February 19

CPR Anyone? - Family Room Resuscitation

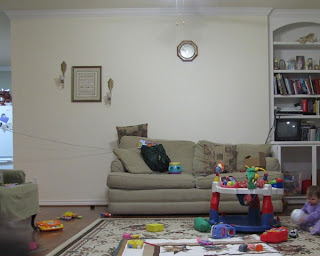
Well, I gave you a sneak peak of some trim I was painting the other night. And I will tell you that it’s for our family room. That room is in need of resuscitation. It just feels dead and dingy to me. Here is a before pic of the room (try not to cringe).  It looks very bare because it’s cleaned up.  Usually it is covered with toys from the kids.  I don’t bother putting décor items out (they’d just destroy them).  The tables are usually covered with books and puzzles anyway.

before room1

The first stop in my family room revitalization is the sofa.

before sofa

Actually the first stop was IKEA. Hubby and I made a pilgrimage to the huge store and picked up a few things including this slip-cover for their Hovas sofa.

I don’t actually have a Hovas sofa, but I have a sofa that is the same shape and just slightly smaller than IKEA’s sofa. And for a price of $49 I couldn’t resist buying this beautiful white canvas slipcover and doing a little of my own tailoring to make it fit. So with a little nip here and a little tuck there…

nip&tuck

… I now have a new (did I mention easy) IKEA slipcover to fit my Lazy Boy sofa. Shhh.. don’t tell. ;)

Next I needed to recover my pillows. I pulled some colors out of my fabric stash.  I wanted some with texture and remembered a blog post by Censational Girl about using a bath rug to make a pillow cover. As it happens, hubby and I had JUST bought some great bath rugs at Home Goods. And every time I go in the bathroom, my two year old runs in to lie down on the new rug. It’s comfy looking! So I thought this would, indeed, make a good pillow cover. Oh, and hubby’s response? “Go ahead; I know where I can get another rug.” Isn’t he great?!!

bathmat pillow3

I also found some inspiration for another pillow from a ruffled duvet cover at Urban Outfitters.  I’ve included a tutorial for you below.

~ Ruffled Pillow Tutorial ~

1. Cut out two squares of fabric the size of your pillow plus seam allowance.
 PillowTutStep1

2. Cut strips of fabric and make ruffles. Then, using a string attached to a fabric marker, draw an arc on the corner of the fabric as a guide for your first ruffle.
PillowTutStep2

3. Place your ruffle on the line and pin to keep the gathers from moving as you sew.
PillowTutStep3

4. Sew the ruffle on.
PillowTutStep4

5. Repeat steps 2-4 until you have as many ruffles as you like.
PillowTutStep5

6. Sew the two pieces together (right sides facing). Either add a zipper as I did or sew the fourth side after inserting the pillow.
PillowTutStep6

Ruffled Pillow


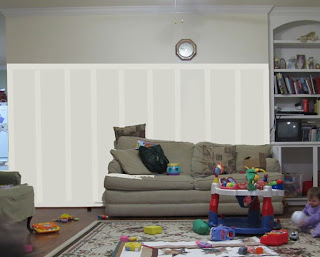
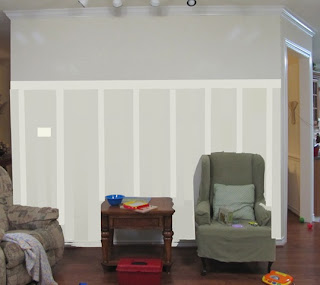
So after all that, here are the current updates to the room.  Still many more to go.

sofa update

bathmat pillow2

pillows1

pillows2

pillows3

Hopefully I can get the trim up on the wall this week and show you. It’ll be a HUGE change for the room! Can’t wait!!

Rebecca


Linking up at:


Funky Junk's Saturday Nite Special The Lettered Cottage

LinkWithin

Related Posts with Thumbnails