When I picture the windows open in a room, I imagine warm sunshine streaming through as the wind gently blows the curtains. Fresh air hits me and I am compelled to take a deep breath. The refreshing energy fills my soul. Of course there are only certain seasons when it's practical to open the windows, but my goal is to fill my heart, home, and family with a beautiful serenity that always makes me think the windows are open!

Monday, July 26

Fun Little Summery Cocktails

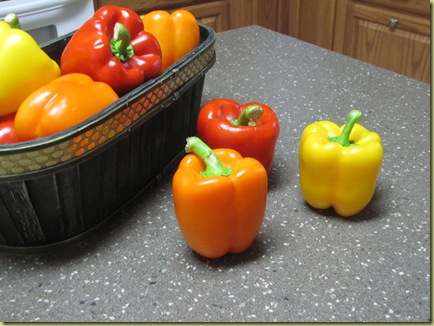
I really love summer time.  Especially all the bright festive colors and cool summer drinks.  This week red, orange, and yellow peppers are on sale at the grocery store so I stocked up.  I’m using some with supper tonight, and putting the rest in the freezer.
01-pepper basket

I decided to use them in a salad to be paired with pork chops marinated with pineapple and OJ.  That’s when I got an idea to make up some pre-dinner drinks using the peppers as cocktail glasses.  Then, after they’ve soaked up a little of the fruity flavors, I’ll chop them up and add them to the salad.

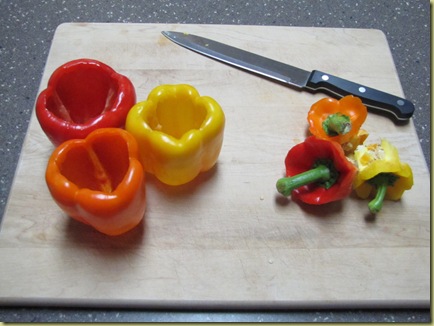
First, I picked out peppers that had nice flat bottoms and stood up well by themselves.  You don’t want your yummy cocktail falling over.  :) 02-flat bottoms

Then I cut around the tops and twisted out the seeds.  (Think stuffed peppers).  Make sure all the seeds are out.
03-empty peppers
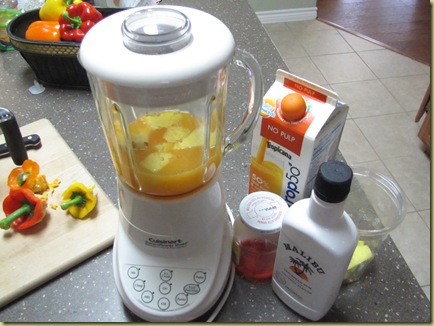
In the blender I mixed up a favorite rum punch with OJ, fresh pineapple and a tad of cherry juice.  The rum is optional if you prefer a mocktail.  I like Malibu Caribbean Rum in this drink..  It has a fresh coconut flavor.04-blender

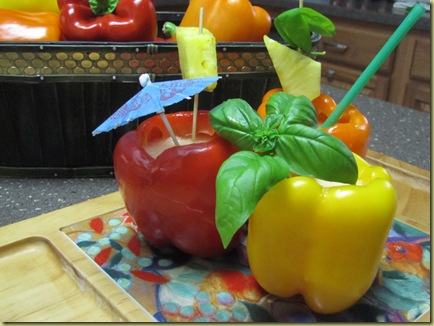
Then just fill your hollowed out peppers and add a straw.  You can get creative with the garnishes too.05- drinks

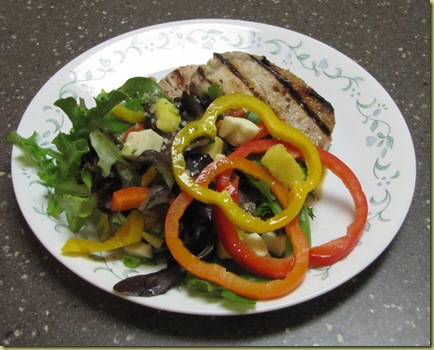
So after our drinks were finished.  I grilled the pork chops and tossed up some salad - baby lettuce mix, fresh mozzarella, pineapple, basil, and the chopped peppers which I topped with a homemade lemon basil dressing. 06-dinner

Superb!!  I hope this inspires you to enjoy some of summer’s fresh, colorful foods.

Rebecca

Gonna catch a party at:
The Girl Creative   The DIY Show Off 

Making
CreativeShareWednesdays

Thursday, July 22

The Closet is Finished

Sure enough, I knew that if I blogged about an unfinished project it would be just the motivation I needed to find time to get it done.  I promise my family has not suffered as a coincidence.  They are still well fed, loved and nurtured.  (But I probably ought to vacuum and do some laundry now.)

And of course it helped that several times this week all three kids napped at the same time!!

So, at last, I got the closet finished.  If you missed how I’ve been without a master closet for the last two years, go <here>.  Before this project, it was just a bare, empty room.  I used ClosetMaid Selectives shelving and rods from Home Depot in a nice cherry finish.

After pulling our clothes out of boxes, bags, and the kid’s closets, I populated the new rods and shelves.  I’m thrilled with how much space I, um, we really have now.

his sideHis Side
 backsideBack Side

her side Her Side

The room seemed so small before (well it really is small), but now it seems so much bigger with all the custom shelves and hanging rods. 

I did spend a few bucks on a fabric box for laundry. I chose Martha Stewart's because it had a place for a label.
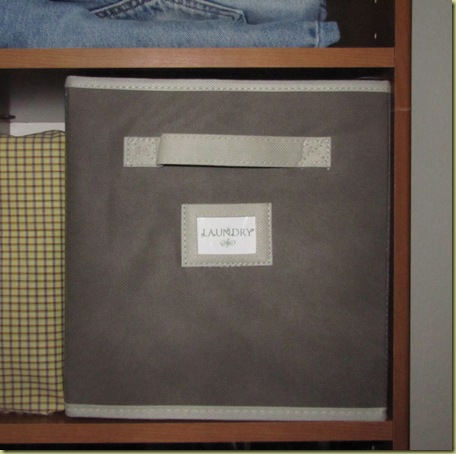
laundry label

Then I considered buying more nice boxes for storing other things, but decided I couldn’t justify spending the money when we have tons of cardboard boxes in the garage.  After all it’s just a closet… with a door… and a dim light to boot…

But then on second thought, who wants to see ugly cardboard boxes in such a nice closet?!? 

Not me. So I pulled my creative brain out of it’s hiding place, dusted it off, and went to work crafting.  First I covered the boxes with some textured wallpaper I got free.  Then I put pretty fabrics on for lids and printed labels. 
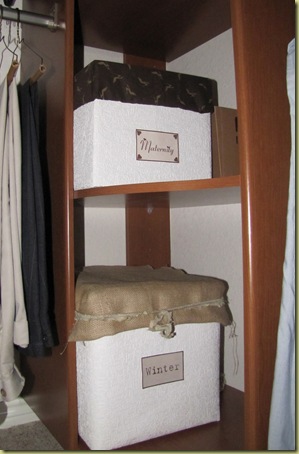
  box labels

There!  Pretty and functional.  I love the brown fabric and the “Winter” box just has a scrap of burlap tied over the top.

Ooh, me so happy!!!

So then today while I was reading back in my blogroll I saw Ronda’s closet makeover featured at The DIY Show Off.  I loved the His and Her signs she did but wanted something a little different.  I’ve had these frames tucked away for a while and her post inspired me to use them in our closet.  Here’s where the inspiration took me.

On hubby’s side a daily reminder of my love from Uppercase Living.
his

On my side, a daily reminder of the kind of woman I should be.  (First saw this quote by Maya Angelou on my friend Dawn’s FB page.  Love it girlie - had to borrow.)
hers

Organization feels so good.


Rebecca


Check out this project and tons of other great talent at The DIY Showoff's Project Parade, The Girl Creative, and Making the World Cuter Mondays!

Saturday, July 17

Custom Master Closet

Do you ever have those projects that you think you will complete in just one day, but somehow three weeks later you’re STILL working on them.  I’m in the middle of one of those right now.  For the last two years I’ve been keeping a dirty little secret.  Every time someone comes to visit, since we built the house two years ago, I try to make sure everything is clean and nicely decorated.  Or at least as well as you can do that with toddlers.  LOL!  But what no one has known (until now) is that I don’t have a master closet!!  I mean I have a room, but for two years I have had no hanging rods, shelves, NOTHING!  Just boxes with clothes, piles of clothes, and shoes strewn underneath everything.  Yeah, you could really get lost in there.  A few months ago I finally put up a shower curtain rod for my husband to hang his nice shirts on.

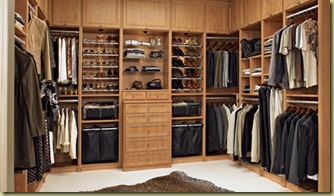
WHY?!? you ask, would the builder not finish the closet!!  Well, solely because I told him not to.  You see, I had this vision of a beautiful custom closet.  Like these:
closet organization3
closet organization2

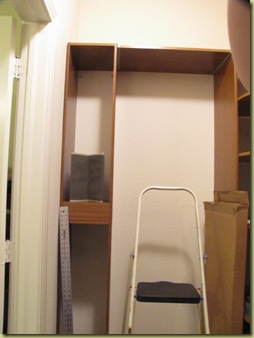
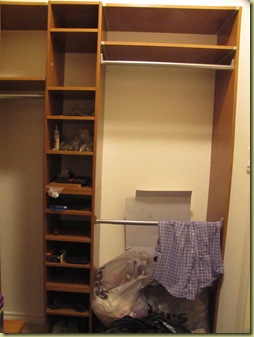
And I was going to get it done soon after we built the house.  But then, YIKES! KaCHING! Have you seen the price of those things?!?  So I procrastinated for two years trying to decide whether to build my own or buy a cheaper alternative then the nice ones.  Finally after living off the floor for so long I gave up on ever having time to make one myself and broke down and spent still too much money on some cheaper ClosetMaid shelving and rods.  That was three weeks ago and it was supposed to be finished that day.  Now, after several additional trips to Home Depot, cause let’s face it once you get it in the space it’s always easier to redesign and use the space more efficiently, I’m ALMOST finished. BTW, it’s hard taking pics inside a small closet with my camera, sorry.
IMG_1362 Left wall

IMG_1360Left back corner

IMG_1363 Right back corner

IMG_1364Right wall 
 

Maybe in another three weeks…  I’ll keep you posted.

Rebecca

Friday, July 9

Painted Toadstool

Today I managed to get all three of my little ones to nap at the same time.  So I got to sit down at their craft table to do a craft of my own.  
clipart
I love the look of the red toadstools with white spots and have wanted one for outdoor decor in my garden.  You know, the ones where the fairies live in the children’s stories.  But I couldn’t find any I loved - in the right size - at the right price. 

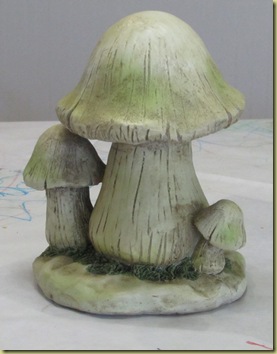
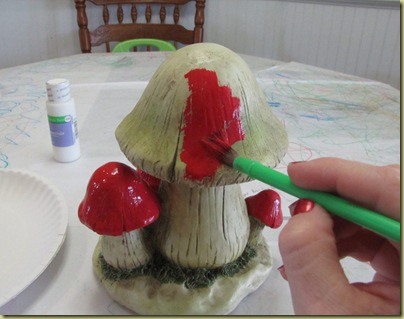
Instead I found this online and bought some craft paint.original mushrooms


I used Jo-Ann Craft Essentials Gloss Acrylic Paint in “Bright Red” and “White”.  They are durable for outdoor and indoor use.
paint

progress1 progress2 progress3
Ooh I’m all tipsy, excited. I’m loving how this looks.  **drumming fingers on the table… waiting impatiently for the red paint to dry**  Oops, maybe I should go take the clothes out of the washer and put them in the dryer while I wait.  BRB

*            *            *            *            *            *            *            *            *            *

K, I’m back.  Yep today is cloth diaper washing day.  Then after that it’s wash the potty trainer’s sheets for the second time this week.  But hey, gotta love being a mom!

So here it is with the white dots painted on.
white dots

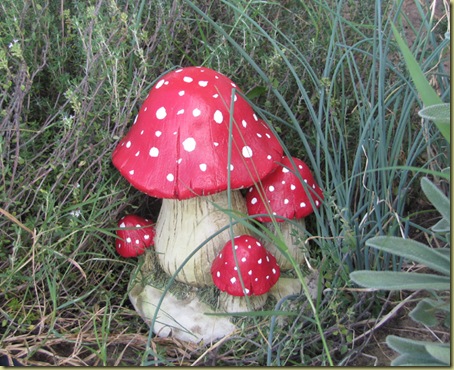
And in it’s new home in my herb bed.
at home

I’m so in love with how this turned out!  And I can’t believe how easy it was.  Mu-ahh!

Rebecca

You can find this party girl at:


CreativeShareWednesdays

LinkWithin

Related Posts with Thumbnails